A Symphony of Shadows: Understanding and Eliminating Screen Noise
There's a profound beauty to vintage slide projectors, isn't there? More than just a mechanical device, they're portals to another time, vessels carrying echoes of laughter, family gatherings, and carefully preserved moments. I remember my grandfather's projector, a hefty Kodak Carousel, its whirring gears and soft hum a soundtrack to countless evenings. It wasn’s just projecting images; it was sharing a legacy. But as with all things aged, these faithful machines can develop quirks. And one of the most frustrating is "screen noise" - those unwanted artifacts that mar the otherwise pristine picture. This isn't simply a technical issue; it's a disruption of that evocative, emotional experience.
The Nature of the Beast: Identifying Screen Noise
So, what exactly *is* screen noise? It’s a broad term encompassing anything that detracts from the clarity of the projected image, beyond the intentional content of the slide itself. It can manifest as flickering, speckling, uneven brightness, or even a faint, rhythmic pattern that dances across the screen. The sources are varied, and often intertwined, making diagnosis a process of careful observation and methodical elimination. Is it a single, persistent artifact, or a shifting constellation of imperfections?
Dust: The Constant Companion
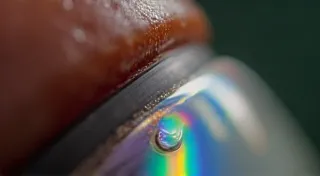
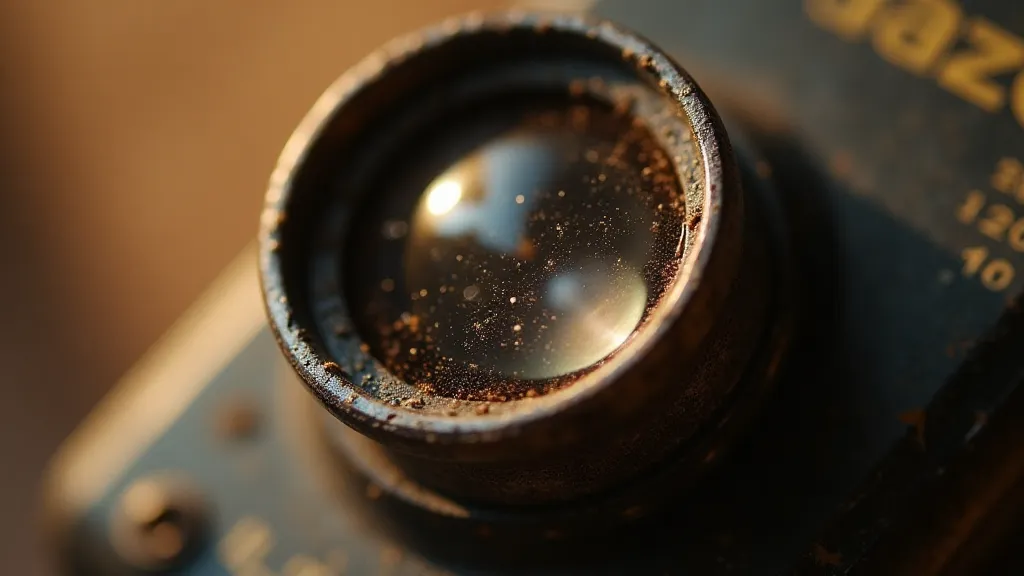
Let’s start with the most common culprit: dust. These tiny particles, drawn into the projector’s intricate system, settle on the light bulb, the lamphouse mirrors, and, critically, the slide gate – the opening through which each slide is exposed. Even seemingly insignificant amounts of dust can scatter light, creating a speckled effect that diminishes contrast and obscures detail. It’s a bittersweet irony; the act of preserving memories can itself introduce new imperfections. Think of the early photographers, painstakingly cleaning their glass negatives, forever battling the encroaching presence of dust. It’s a constant struggle in analog processes.
Eliminating dust requires patience and meticulous cleaning. Compressed air is a good starting point, but a soft brush – preferably one designed for optics – is essential for dislodging stubborn particles. Be incredibly gentle; scratching the sensitive surfaces is far worse than a bit of dust. A good rule of thumb is to clean in a well-lit area, allowing you to see the dust clearly. Consider wearing cotton gloves to avoid transferring oils from your hands.
Scratches and Imperfections on the Slides Themselves
Dust isn't the only physical imperfection. The slides themselves, often decades old, can bear the marks of time – scratches, light leaks, and fading. These aren’t projectable defects; they’re inherent to the slide's condition. While a projector can’t *fix* a damaged slide, understanding the nature of the imperfection can inform your restoration efforts. Are the scratches superficial, or do they penetrate the emulsion? Is the fading uniform, or localized to specific areas? This careful assessment allows you to prioritize which slides are worth the effort of restoration and which are best archived.
Sometimes, what appears to be a scratch is actually a light leak – a tiny imperfection in the slide’s mounting. These leaks can create distracting patterns of light and shadow. Carefully inspecting the slide in good light can often reveal the source of the leak. Replacing the slide’s mounting or even re-mounting the transparency can often mitigate the issue. The preservation of analog photography is frequently a process of meticulous repair and careful compromise.
Electrical Interference: Ghosts in the Machine
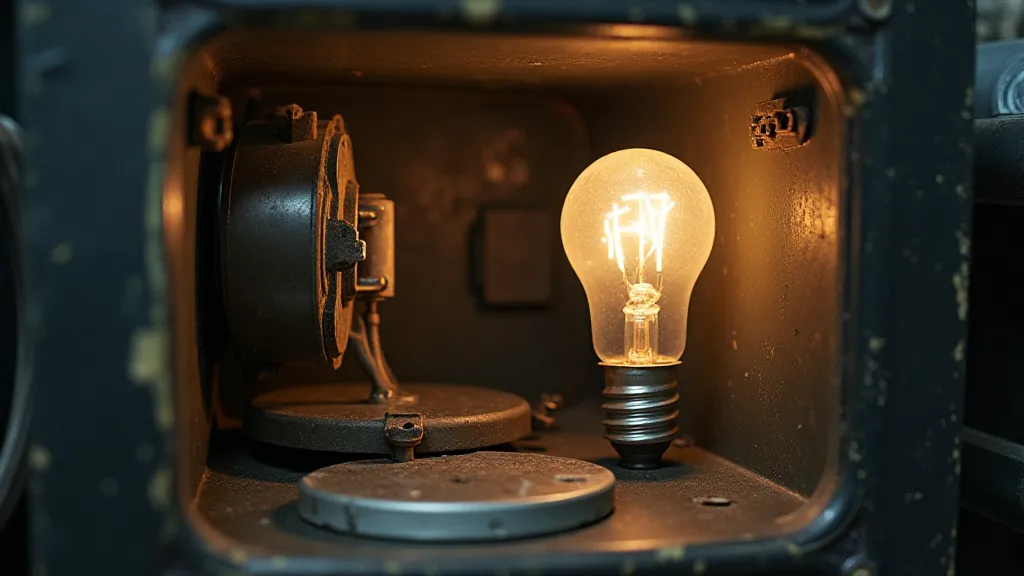
Beyond physical imperfections, electrical interference can manifest as flickering or a rhythmic pattern on the projected image. This is often caused by a grounding problem, a faulty capacitor, or interference from nearby electrical equipment. The whirring of the projector motor itself can induce a slight hum, which, when amplified by the projection system, becomes noticeable. This is where a little electrical know-how becomes invaluable. It's sometimes a matter of ensuring the proper illumination to combat these problems – if the light isn’t bright enough, the imperfections become more obvious. Troubleshooting these issues can sometimes feel like chasing "ghosts in the machine," and the sources of these problems are often complex.
Diagnosing electrical issues requires careful observation and, often, a multimeter. Look for signs of overheating, bulging capacitors, or loose connections. If you’re not comfortable working with electrical components, it's best to seek the assistance of a qualified technician. Remember, safety is paramount. A failing motor can contribute significantly to this flickering; diagnosing and addressing problems with the secret life of projector motors is crucial for a stable and clear projection.
The Mirrors: Crucial Reflectors
The mirrors within the projector are absolutely critical to the projection process. They direct the light path, ensuring that the image is properly focused and bright. Over time, these mirrors can become tarnished, coated with dust, or even slightly misaligned. Tarnishing reduces light transmission, resulting in a dimmer image. Misalignment distorts the projected image. Cleaning the mirrors requires special care; standard glass cleaners can damage the reflective coating. A dedicated optical cleaning solution, applied with a soft cotton swab, is the safest option.
If the mirrors are severely tarnished or damaged, replacement is often the only solution. Sourcing replacement mirrors can be challenging, but it’s often possible to find them on online marketplaces or through vintage projector repair specialists. Proper alignment of the mirrors is essential for optimal image quality; this may require specialized tools and expertise.
The Motor: A Symphony of Movement
The motor is the heart of the slide projector, driving the film transport mechanism and advancing the slides one by one. A worn or failing motor can cause a variety of problems, including erratic slide advancement, excessive noise, and a flickering image. While a completely new motor is sometimes necessary, many motor problems can be resolved with simple repairs, such as cleaning the commutator (the rotating part of the motor) and lubricating the bearings. The sounds a projector makes, the whirring, the clicks – they're a direct testament to its mechanical nature and craftsmanship. Sometimes the issues stem from beyond the motor itself, involving challenges with the rhapsody in gears that govern the projector's rotation mechanism.
Preserving a Legacy: More Than Just Repair
Repairing a vintage slide projector is more than just fixing a mechanical device; it’s a way of preserving a legacy, of connecting with the past, and of ensuring that those cherished memories continue to be shared for generations to come. It's an act of reverence for the craftsmanship of a bygone era, when products were built to last and designed with a certain elegance and functionality. The effort invested in the repair isn’t just about eliminating screen noise; it's about breathing new life into a piece of history. The key is often ensuring the right balance of light and mechanics, as imbalances often lead to observable issues. Many users find diagnosing problems starts with understanding the fundamental challenges of achieving proper focus—a topic covered in detail in the oracle of the lens.
The subtle imperfections – the dust motes dancing in the light beam, the occasional scratch on a slide – are part of the story. They’re reminders of the passage of time, of the hands that handled these images, and of the memories that they hold. Embrace the imperfections; they’re part of what makes vintage slide projection so uniquely captivating.
Beyond the mechanical and physical aspects, the overall experience is also deeply influenced by the light quality. Troubleshooting common illumination issues, often referred to as the ghost light of memory, is crucial for achieving that authentic vintage projection feel.