Whispers from the Past: Troubleshooting Flicker and Inconsistent Projection
There's a particular magic to projecting old slides. It’s more than just seeing images; it's holding a moment in time, bathed in the warm glow of a vintage projector. These machines, often lovingly referred to as carousel projectors or simply slide projectors, aren't just pieces of equipment; they are relics of a more deliberate, considered approach to photography. They're witnesses to family gatherings, vacations frozen in celluloid, and the quiet moments of lives lived before the digital age. But sometimes, that magic fades. A flickering image, a dim projection, or an unstable carousel – these are the frustrations that plague those who try to resurrect these treasures.
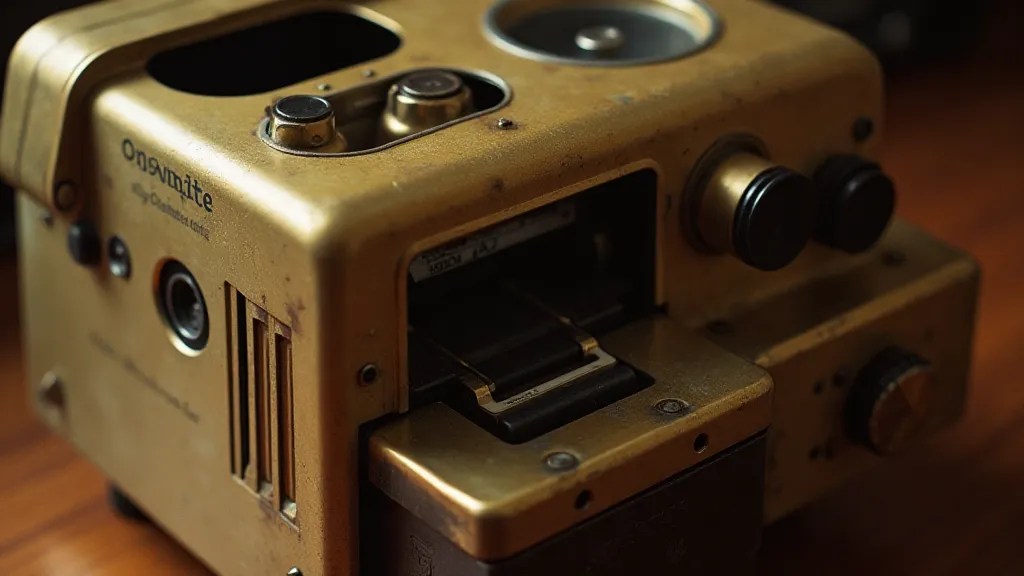
I remember my grandfather’s projector. A massive Kodak Reflecta, it stood nearly four feet tall, a battleship of brass and Bakelite. The whirring of its motor, the click-clack of the carousel turning, the scent of warm metal – these were the sounds and smells of Christmas morning, of family history being shared. Seeing it now, silent and struggling with a sporadic flicker, felt like a personal loss. This article is an attempt to understand, and hopefully rectify, the reasons that beauty sometimes falters, and to breathe life back into these magnificent machines.
Understanding the Sources of the Flickering
Flickering in a slide projector isn’t usually a single, simple problem. It’s often a symptom of multiple, interconnected issues. Before diving into repair, it’s crucial to understand the possible culprits. Let's break them down, moving from the easiest to diagnose to the more complex.
Slide Condition: This is the first place to look. Dirty, scratched, or faded slides will *always* appear problematic. Dust motes dance in the light, and surface imperfections become amplified on the screen. Clean your slides meticulously – a soft brush and specialized slide cleaner are essential. Handle them with gloves to avoid fingerprints, which can cause a similar effect. It might seem obvious, but it’s astonishing how often a simple slide cleaning resolves a perceived projection issue.
Light Source Issues: Vintage slide projectors typically use incandescent lamps. These lamps age and dim over time. A weak lamp can cause uneven brightness and a flickering appearance. If the lamp is nearing the end of its life, replacing it is often the simplest fix. Be sure to use the correct wattage and voltage lamp – incorrect specifications can damage the projector. The reflector behind the lamp is also critical; a dirty or damaged reflector will scatter the light, reducing brightness and contributing to an inconsistent image. Achieving optimal brightness and longevity for these lamps is a delicate balance, and understanding the nuances of bulb life is vital for consistent projections.
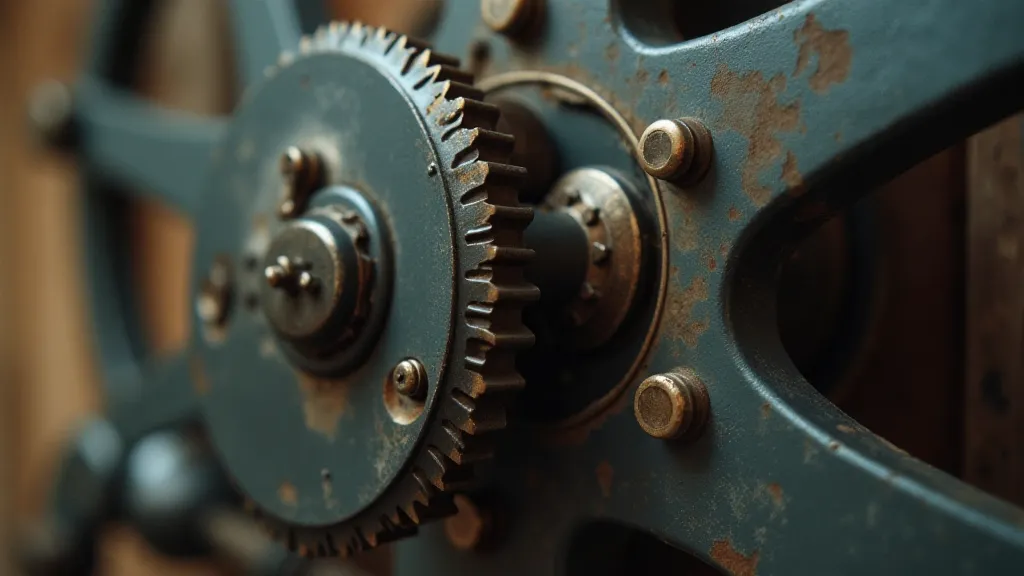
Carousel Alignment & Drive System: The carousel itself needs to rotate smoothly and consistently. Any wobble, uneven pressure on the slides, or a failing drive motor will cause the image to flicker as the slides pass through the light path. Look for signs of wear on the carousel rails. The drive belt (if present) can become stretched or cracked. The indexing mechanism – the part that accurately positions each slide – can become gummed up with old lubricant. Cleaning and re-lubricating the carousel mechanism is often a necessary step.
Condenser Lens Problems: The condenser lens focuses the light onto the slide. If it's dirty, scratched, or misaligned, it will distort the image and cause uneven illumination. Carefully clean the condenser lens with a specialized lens cleaning solution. Some projectors allow for condenser adjustment; consult the service manual to determine if yours allows for this, and if so, ensure it’s properly aligned. Misalignment can frequently be subtle, requiring careful observation. The geometry of projection is complex, and careful alignment of optics is essential for clear, focused images.
Deep Dive: Addressing Common Problems
Let’s move beyond the basic checks and address some of the more common culprits in detail.
The Dried-Up Lubricant Syndrome: Vintage projectors are notorious for this. Old lubricants dry out, turning gummy and sticky, hindering the movement of various components. This is particularly common in the carousel mechanism and the lamp housing adjustment. A careful application of a suitable lubricant (avoid silicone-based lubricants, as they can damage some plastics) can often resolve jerky movements and flickering. A small brush is ideal for applying lubricant precisely.
The Drive Belt Dilemma: Many older carousel projectors rely on a rubber drive belt to rotate the carousel. These belts degrade over time, becoming brittle and losing their elasticity. A stretched or cracked belt will slip, causing intermittent movement and a flickering projection. Replacing the belt is a relatively straightforward repair, but it's important to source a belt of the correct size and thickness. Careful attention to detail and understanding the inner workings will allow you to navigate the cartography of memories within the machine.
The Lamp Housing Adjustment Lock-Up: Some projectors have a mechanism to adjust the lamp housing, allowing for fine-tuning of the projection focus. This mechanism can become locked up due to dried lubricant or corrosion. Freeing up this mechanism requires careful manipulation and lubrication. Forcing it can cause damage, so patience and a gentle touch are paramount.
The Importance of Cleanliness and Reflection
Beyond the core mechanical issues, the quality of the reflected light plays a critical role in a vibrant, consistent projection. The mirrors and reflectors within a carousel projector are designed to precisely direct light, amplifying its intensity and creating a bright, clear image. Over time, these surfaces accumulate dust, grime, and oxidation, significantly diminishing their reflective properties. This reduction in reflectivity can manifest as a dim, uneven projection or, frustratingly, a flickering image as light is intermittently blocked or scattered.
Addressing this requires more than a casual wipe-down. Specialized cleaning solutions and techniques are often necessary to remove stubborn deposits without damaging the delicate reflective coatings. A crucial aspect of maintaining a carousel projector is understanding how to properly clean and maintain these mirrors and reflectors, ensuring they continue to perform at their optimal level. The accumulation of even a thin layer of dust can disrupt the projection quality, causing visible distortions and a general lack of clarity.
The Art of Patience and Respect
Repairing vintage slide projectors isn’t just about fixing a broken machine; it’s about preserving a piece of history. These projectors represent a different era, an era of craftsmanship and attention to detail. They were built to last, and with a little care and attention, they *can* last for generations.
Don't be afraid to consult service manuals. They are invaluable resources, providing detailed diagrams and troubleshooting guides. Online forums dedicated to vintage photography equipment are also excellent sources of information and support. Remember, progress is often incremental. Small improvements can add up to a significant difference.
Respect the Machine: These projectors weren’t built for disposable culture. Take your time, observe carefully, and appreciate the intricate workings of these mechanical marvels. The satisfaction of restoring these projectors comes from a deeper understanding of their inner workings and the dedication that went into creating something truly special. Think of the countless memories shared, the family gatherings illuminated, all thanks to these ingenious machines.
That first, clear, stable projection after a repair – that’s more than just a functional machine; it’s a resurrected memory, a shared moment brought back to life, and a testament to the enduring power of analog photography.